Bomgar allows authentication via LDAP, kerberos, RAID and SAML. UiO chose to use the last one as the authentication process happens on on-premise systems, since the user is redirected to authenticate on the "Universitets- og høgskolensektoren" page.
This procedure described in this document followed what is recommended by Microsoft on the following document: https://docs.microsoft.com/en-us/azure/active-directory/saas-apps/bomgarremotesupport-tutorial and by some instructions received from BeyondTrust, Bomgar's parent company.
The configuration of Azure AD is somewhat straightforward, and requires:
- a user with sufficient rights to install an Enterprise Application (and to add one from marketplace if the application doesn't exist)
- a user with sufficient rights to configure the application
Previously to the steps above, GWD added the "Bomgar Remote Support" application from Microsoft Marketplace so that the application is available on UiO's portfolio of Enterprise Applications on Azure AD.
After that, the application was configured this way:
Single Sign-on configuration
When selecting the "Bomgar Remote Support" application on under Enterprise Applications, select Single Sign-on:

Then, choose "SAML" and, if available, "Basic SAML configuration".
At the Single sign-on configuration, the best way to configure is to actually to import the metadata.xml file from Bomgar and, accordingly, download the metadata file from Azure AD and import it into Bomgar:

We edited the section "Basic SAML configuration", copying the "Reply URL" to the "Single sign-on URL".
We also edited the "User attributes & Claims" so that we could get specific unique identifiers. It was also important to change the "Emailaddress" field to "user.userpreferredname", as most users provisioned to the application are "drift"-users, which means that they don't have a "user.mail" field. We also removed "-drift" from the addresses, so that the user can receive e-mails from Bomgar. We also changed the "Unique User Identifier" to remove the "@uio.no" part.
User provisioning
After that, we added users allowed to use this application, which, in this case, means to be able to authenticate using this application. This is just a matter of adding users under the "Users & Groups" panel.
Bomgar configuration
On Bomgar, the authentication provider is called "Security provider". A SAML security provider was created under "Users & Security - Security providers".
After importing the metadata.xml mentioned above into Bomgar, the only configuration we changed was the mapping of the user attributes, which look now like this:
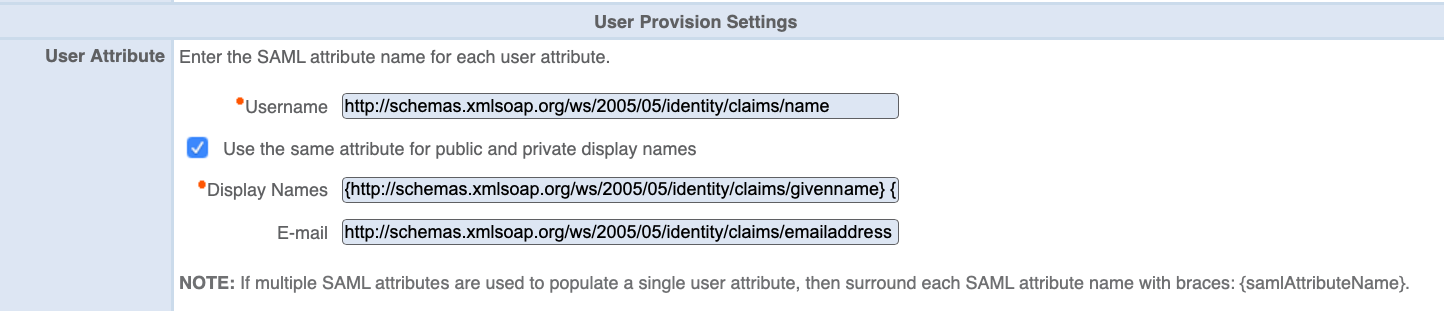
We also emptied the field "Group Lookups", as currently there are no groups imported from LDAP into Azure AD. The user attributes mapping look now like this:
Username: http://schemas.xmlsoap.org/ws/2005/05/identity/claims/name
Display name: {http://schemas.xmlsoap.org/ws/2005/05/identity/claims/givenname} {http://schemas.xmlsoap.org/ws/2005/05/identity/claims/surname}
E-mail: http://schemas.xmlsoap.org/ws/2005/05/identity/claims/emailaddress
The fields in bold reflect the fields under "User attributes and claims" on Azure AD (see above).
The group "Bomgar temporary" was added on the "Users and groups" menu of this application. Any user on this group will be able to authenticate via this app.
SAML users are created on Bomgar on the fly after the first authentication, and end up on the "Local IT" group. They have to be manually moved to other groups if they have other roles.